This tutorial explains about that how to receive push notifications in android using GCM (Client side).
Follow some steps here that how to do Push Notifications for android using Google Cloud Messaging:
1. How to create an Google API project?
Follow the steps for creating new Google API project.
1. Open the Google API console page (Google account required).
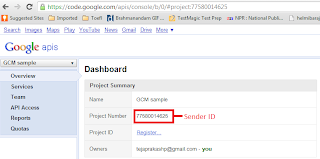
The page open like this.
 2. Click Create project. Your browser URL link will change something like below
https://code.google.com/apis/console/b/0/?pli=1#project:77580014625
NOTE:
Take down the Sender-ID from your browser URL.
OR
Go to Overview->Dashboard.
3. Enable the toggle Google Cloud Messaging for Android in services and accept the terms in the Terms of service page.

4. Generate new server API key.
a. In main page, select API Access.

b. Click on Create new Server Key. Either a server key or a browser key should work. The advantage to using a server key is that it allows you to whitelist IP addresses. The following screen appears:

c. Click Create.

NOTE:
Take down server API key (your serverApi key here). It will used in server side to send notification. New server key activate within 24 hours.
2. Install Library in android SDK:
Go to SDK Manager, Extras > Google Cloud Messaging for Android Library and install it.

If installation successful then you can find gcm directory under Your_SDK_Installed_Path/extras/google/ containing these sub-directories: gcm-client, gcm-server, samples/gcm-demo-client, samples/gcm-demo-server, and samples/gcm-demo-appengine.
Note:
If you don't see Extras > Google Cloud Messaging for Android Library in the SDK Manager, make sure you are running version 20 or higher. Be sure to restart the SDK Manager after updating it.
3. Android GCM Application (Client Side):
A. Copy the gcm.jar file to res->libs folder in your android project. You can find this file in Your_SDK_root\extras\google\gcm\gcm-client\dist.
B. Required permissions and changes in your android manifest file is follows.
<!-- GCM works minimum version of 2.2 and maximum xx i.e latest version. -->
<uses-sdk
android:minSdkVersion="8" android:targetSdkVersion="xx" />
<permission android:name="Your PackageName.permission.C2D_MESSAGE"
android:protectionLevel="signature" />
<uses-permission android:name="Your PackageName.permission.C2D_MESSAGE" />
<!--Note: the above 2 permissions is not required on 4.1 or above.-->
<!-- App receives GCM messages. -->
<uses-permission android:name="com.google.android.c2dm.permission.RECEIVE" />
<!-- GCM connects to Google Services. -->
<uses-permission android:name="android.permission.INTERNET" />
<!-- GCM requires a Google account. -->
<uses-permission android:name="android.permission.GET_ACCOUNTS" />
<!-- Keeps the processor from sleeping when a message is received. -->
<uses-permission android:name="android.permission.WAKE_LOCK" />
<!-- BroadcastReceiver. -->
<receiver android:name="com.google.android.gcm.GCMBroadcastReceiver"
android:permission="com.google.android.c2dm.permission.SEND" >
<intent-filter>
<action android:name="com.google.android.c2dm.intent.RECEIVE" />
<action android:name="com.google.android.c2dm.intent.REGISTRATION" />
<category android:name="Your PackageName" />
</intent-filter>
</receiver>
<!-- Add service Intent. -->
<service android:name=".GCMIntentService" />
C. Paste the below strings in res->values->strings.xml. If not there then create new one.
<resources>
<string name="app_name">Prakash Creative</string>
<string name="hello_world">Hello world!</string>
<string name="menu_settings">Settings</string>
<string name="title_activity_main">MainActivity</string>
<string name="error_config">Please set the %1$s constant and recompile the app.</string>
<string name="already_registered">Device is already registered.</string>
<string name="gcm_registered">From GCM: device successfully registered!</string>
<string name="gcm_unregistered">From GCM: device successfully unregistered!</string>
<string name="gcm_message">From GCM: you got message!</string>
<string name="gcm_error">From GCM: error (%1$s).</string>
<string name="gcm_recoverable_error">From GCM: recoverable error (%1$s).</string>
<string name="gcm_deleted">From GCM: server deleted %1$d pending messages!</string>
<string name="server_registering">Trying (attempt %1$d/%2$d) to register device on Demo Server.</string>
<string name="server_registered">From Demo Server: successfully added device!</string>
<string name="server_unregistered">From Demo Server: successfully removed device!</string>
<string name="server_register_error">Could not register device on Demo Server after %1$d attempts.</string>
<string name="server_unregister_error">Could not unregister device on Demo Server (%1$s).</string>
<string name="options_register">Register</string>
<string name="options_unregister">Unregister</string>
<string name="options_clear">Clear</string>
<string name="options_exit">Exit</string>
</resources>
D. Create new class called CommonUtilities.java and add the below code.
public final class CommonUtilities {
/**
* Base URL of the Demo Server (such as http://my_host:8080/gcm-server)
*This link helps you to save or register your Registration-id in server. I used .net service
here.
*/
static final String SERVER_URL = "http://10.0.2.2:10739/GCM-server.asmx/PostRegistration-Id";
/**
* Google API project id is your SENDER_ID and it is use to register with GCM.
*/
static final String SENDER_ID = "77580014625";
/**
* Tag used on log messages.
*/
static final String TAG = "Prakash Creative";
/**
* Intent used to display a message in the screen.
*/
static final String DISPLAY_MESSAGE_ACTION =
" Your.Package.Here.DISPLAY_MESSAGE";
/**
* Intent's extra that contains the message to be displayed.
*/
static final String EXTRA_MESSAGE = "message";
/**
* Notifies UI to display a message.
* <p>
* This method is defined in the common helper because it's used both by the
* UI and the background service.
*
* @param context
* application's context.
* @param message
* message to be displayed.
*/
static void displayMessage(Context context, String message) {
Intent intent = new Intent(DISPLAY_MESSAGE_ACTION);
intent.putExtra(EXTRA_MESSAGE, message);
context.sendBroadcast(intent);
}
}
E.Create a new class called GCMIntentService. The following methods which are called by GCMBroadcastReceiver.
Follow the below code for GCMIntentService.java:
public class GCMIntentService extends GCMBaseIntentService{
private static final String TAG = "GCMIntentService";
public GCMIntentService() {
super(SENDER_ID);
}
@Override
protected void onRegistered(Context context, String registrationId) {
Log.i(TAG, "Device registered: regId = " + registrationId);
displayMessage(context, getString(R.string.gcm_registered));
ServerUtilities.register(context, registrationId);
}
@Override
protected void onUnregistered(Context context, String registrationId) {
Log.i(TAG, "Device unregistered");
displayMessage(context, getString(R.string.gcm_unregistered));
if (GCMRegistrar.isRegisteredOnServer(context)) {
ServerUtilities.unregister(context, registrationId);
} else {
// This callback results from the call to unregister made on
// ServerUtilities when the registration to the server failed.
Log.i(TAG, "Ignoring unregister callback");
}
}
@Override
protected void onMessage(Context context, Intent intent) {
Log.i(TAG, "Received message");
//String message = getString(R.string.gcm_message);
String message = intent.getStringExtra("message");
displayMessage(context, message);
// notifies user
generateNotification(context, message);
}
@Override
protected void onDeletedMessages(Context context, int total) {
Log.i(TAG, "Received deleted messages notification");
String message = getString(R.string.gcm_deleted, total);
displayMessage(context, message);
// notifies user
generateNotification(context, message);
}
@Override
public void onError(Context context, String errorId) {
Log.i(TAG, "Received error: " + errorId);
displayMessage(context, getString(R.string.gcm_error, errorId));
}
@Override
protected boolean onRecoverableError(Context context, String errorId) {
// log message
Log.i(TAG, "Received recoverable error: " + errorId);
displayMessage(context, getString(R.string.gcm_recoverable_error,
errorId));
return super.onRecoverableError(context, errorId);
}
/**
* Issues a notification to inform the user that server has sent a message.
*/
private static void generateNotification(Context context, String message) {
int icon = R.drawable.ic_stat_gcm;
long when = System.currentTimeMillis();
NotificationManager notificationManager = (NotificationManager)
context.getSystemService(Context.NOTIFICATION_SERVICE);
Notification notification = new Notification(icon, message, when);
String title = context.getString(R.string.app_name);
Intent notificationIntent = new Intent(context, MainActivity.class);
// set intent so it does not start a new activity
notificationIntent.setFlags(Intent.FLAG_ACTIVITY_CLEAR_TOP |
Intent.FLAG_ACTIVITY_SINGLE_TOP);
PendingIntent intent =
PendingIntent.getActivity(context, 0, notificationIntent, 0);
notification.setLatestEventInfo(context, title, message, intent);
notification.flags |= Notification.FLAG_AUTO_CANCEL;
notificationManager.notify(0, notification);
}
You will receive push notifications like below

Download sample code from below links.
Follow some steps here that how to do Push Notifications for android using Google Cloud Messaging:
- First, we have to create an Google API project.
- Install required libraries in android sdk.
- Create client application in android.
- Create one server side application to send messages to GCM server.
 |
| How GCM really works? |
1. How to create an Google API project?
Follow the steps for creating new Google API project.
1. Open the Google API console page (Google account required).
The page open like this.

https://code.google.com/apis/console/b/0/?pli=1#project:77580014625
NOTE:
Take down the Sender-ID from your browser URL.
OR
Go to Overview->Dashboard.

3. Enable the toggle Google Cloud Messaging for Android in services and accept the terms in the Terms of service page.

4. Generate new server API key.
a. In main page, select API Access.

b. Click on Create new Server Key. Either a server key or a browser key should work. The advantage to using a server key is that it allows you to whitelist IP addresses. The following screen appears:

c. Click Create.

NOTE:
Take down server API key (your serverApi key here). It will used in server side to send notification. New server key activate within 24 hours.
2. Install Library in android SDK:
Go to SDK Manager, Extras > Google Cloud Messaging for Android Library and install it.

If installation successful then you can find gcm directory under Your_SDK_Installed_Path/extras/google/ containing these sub-directories: gcm-client, gcm-server, samples/gcm-demo-client, samples/gcm-demo-server, and samples/gcm-demo-appengine.
Note:
If you don't see Extras > Google Cloud Messaging for Android Library in the SDK Manager, make sure you are running version 20 or higher. Be sure to restart the SDK Manager after updating it.
3. Android GCM Application (Client Side):
A. Copy the gcm.jar file to res->libs folder in your android project. You can find this file in Your_SDK_root\extras\google\gcm\gcm-client\dist.
B. Required permissions and changes in your android manifest file is follows.
<!-- GCM works minimum version of 2.2 and maximum xx i.e latest version. -->
<uses-sdk
android:minSdkVersion="8" android:targetSdkVersion="xx" />
<permission android:name="Your PackageName.permission.C2D_MESSAGE"
android:protectionLevel="signature" />
<uses-permission android:name="Your PackageName.permission.C2D_MESSAGE" />
<!--Note: the above 2 permissions is not required on 4.1 or above.-->
<!-- App receives GCM messages. -->
<uses-permission android:name="com.google.android.c2dm.permission.RECEIVE" />
<!-- GCM connects to Google Services. -->
<uses-permission android:name="android.permission.INTERNET" />
<!-- GCM requires a Google account. -->
<uses-permission android:name="android.permission.GET_ACCOUNTS" />
<!-- Keeps the processor from sleeping when a message is received. -->
<uses-permission android:name="android.permission.WAKE_LOCK" />
<!-- BroadcastReceiver. -->
<receiver android:name="com.google.android.gcm.GCMBroadcastReceiver"
android:permission="com.google.android.c2dm.permission.SEND" >
<intent-filter>
<action android:name="com.google.android.c2dm.intent.RECEIVE" />
<action android:name="com.google.android.c2dm.intent.REGISTRATION" />
<category android:name="Your PackageName" />
</intent-filter>
</receiver>
<!-- Add service Intent. -->
<service android:name=".GCMIntentService" />
C. Paste the below strings in res->values->strings.xml. If not there then create new one.
<resources>
<string name="app_name">Prakash Creative</string>
<string name="hello_world">Hello world!</string>
<string name="menu_settings">Settings</string>
<string name="title_activity_main">MainActivity</string>
<string name="error_config">Please set the %1$s constant and recompile the app.</string>
<string name="already_registered">Device is already registered.</string>
<string name="gcm_registered">From GCM: device successfully registered!</string>
<string name="gcm_unregistered">From GCM: device successfully unregistered!</string>
<string name="gcm_message">From GCM: you got message!</string>
<string name="gcm_error">From GCM: error (%1$s).</string>
<string name="gcm_recoverable_error">From GCM: recoverable error (%1$s).</string>
<string name="gcm_deleted">From GCM: server deleted %1$d pending messages!</string>
<string name="server_registering">Trying (attempt %1$d/%2$d) to register device on Demo Server.</string>
<string name="server_registered">From Demo Server: successfully added device!</string>
<string name="server_unregistered">From Demo Server: successfully removed device!</string>
<string name="server_register_error">Could not register device on Demo Server after %1$d attempts.</string>
<string name="server_unregister_error">Could not unregister device on Demo Server (%1$s).</string>
<string name="options_register">Register</string>
<string name="options_unregister">Unregister</string>
<string name="options_clear">Clear</string>
<string name="options_exit">Exit</string>
</resources>
D. Create new class called CommonUtilities.java and add the below code.
public final class CommonUtilities {
/**
* Base URL of the Demo Server (such as http://my_host:8080/gcm-server)
*This link helps you to save or register your Registration-id in server. I used .net service
here.
*/
static final String SERVER_URL = "http://10.0.2.2:10739/GCM-server.asmx/PostRegistration-Id";
/**
* Google API project id is your SENDER_ID and it is use to register with GCM.
*/
static final String SENDER_ID = "77580014625";
/**
* Tag used on log messages.
*/
static final String TAG = "Prakash Creative";
/**
* Intent used to display a message in the screen.
*/
static final String DISPLAY_MESSAGE_ACTION =
" Your.Package.Here.DISPLAY_MESSAGE";
/**
* Intent's extra that contains the message to be displayed.
*/
static final String EXTRA_MESSAGE = "message";
/**
* Notifies UI to display a message.
* <p>
* This method is defined in the common helper because it's used both by the
* UI and the background service.
*
* @param context
* application's context.
* @param message
* message to be displayed.
*/
static void displayMessage(Context context, String message) {
Intent intent = new Intent(DISPLAY_MESSAGE_ACTION);
intent.putExtra(EXTRA_MESSAGE, message);
context.sendBroadcast(intent);
}
}
E.Create a new class called GCMIntentService. The following methods which are called by GCMBroadcastReceiver.
1. onRegistered(Context
context, String regId):
Called after a
registration intent is received, passes the registration ID assigned by GCM to
that
device/application pair as
parameter. Typically, you should send the regid to your server so it can use it
to
send messages to this device.
2. onUnregistered(Context
context, String regId):
Called after
the device has been unregistered from GCM. Typically, you should send the regid
to the
server so it unregisters the
device.
3. onMessage(Context context,
Intent intent):
Called when your
server sends a message to GCM, and GCM delivers it to the device. If the
message
has a payload, its contents are available
as extras in the intent.
4. onError(Context context,
String errorId):
Called when the
device tries to register or unregister, but GCM returned an error. Typically,
there is
nothing to be done other than evaluating
the error (returned by errorId) and trying to fix the problem.
5. onRecoverableError(Context
context, String errorId):
Called when the
device tries to register or unregister, but the GCM servers are unavailable.
The GCM
library will retry the operation using
exponential backup, unless this method is overridden and returns false.
Follow the below code for GCMIntentService.java:
private static final String TAG = "GCMIntentService";
public GCMIntentService() {
super(SENDER_ID);
}
@Override
protected void onRegistered(Context context, String registrationId) {
Log.i(TAG, "Device registered: regId = " + registrationId);
displayMessage(context, getString(R.string.gcm_registered));
ServerUtilities.register(context, registrationId);
}
@Override
protected void onUnregistered(Context context, String registrationId) {
Log.i(TAG, "Device unregistered");
displayMessage(context, getString(R.string.gcm_unregistered));
if (GCMRegistrar.isRegisteredOnServer(context)) {
ServerUtilities.unregister(context, registrationId);
} else {
// This callback results from the call to unregister made on
// ServerUtilities when the registration to the server failed.
Log.i(TAG, "Ignoring unregister callback");
}
}
@Override
protected void onMessage(Context context, Intent intent) {
Log.i(TAG, "Received message");
//String message = getString(R.string.gcm_message);
String message = intent.getStringExtra("message");
displayMessage(context, message);
// notifies user
generateNotification(context, message);
}
@Override
protected void onDeletedMessages(Context context, int total) {
Log.i(TAG, "Received deleted messages notification");
String message = getString(R.string.gcm_deleted, total);
displayMessage(context, message);
// notifies user
generateNotification(context, message);
}
@Override
public void onError(Context context, String errorId) {
Log.i(TAG, "Received error: " + errorId);
displayMessage(context, getString(R.string.gcm_error, errorId));
}
@Override
protected boolean onRecoverableError(Context context, String errorId) {
// log message
Log.i(TAG, "Received recoverable error: " + errorId);
displayMessage(context, getString(R.string.gcm_recoverable_error,
errorId));
return super.onRecoverableError(context, errorId);
}
/**
* Issues a notification to inform the user that server has sent a message.
*/
private static void generateNotification(Context context, String message) {
int icon = R.drawable.ic_stat_gcm;
long when = System.currentTimeMillis();
NotificationManager notificationManager = (NotificationManager)
context.getSystemService(Context.NOTIFICATION_SERVICE);
Notification notification = new Notification(icon, message, when);
String title = context.getString(R.string.app_name);
Intent notificationIntent = new Intent(context, MainActivity.class);
// set intent so it does not start a new activity
notificationIntent.setFlags(Intent.FLAG_ACTIVITY_CLEAR_TOP |
Intent.FLAG_ACTIVITY_SINGLE_TOP);
PendingIntent intent =
PendingIntent.getActivity(context, 0, notificationIntent, 0);
notification.setLatestEventInfo(context, title, message, intent);
notification.flags |= Notification.FLAG_AUTO_CANCEL;
notificationManager.notify(0, notification);
}
F. Create new class called ServerUtilities.java. This is used to register your app details in server. Follow the below code for ServerUtilities class. I have used .net web-service to save the regId in server.
public class ServerUtilities {
private static final int MAX_ATTEMPTS = 5;
private static final int BACKOFF_MILLI_SECONDS = 1000;
private static final Random random = new Random();
/**
* Register this account/device pair within the server.
*
* @return whether the registration succeeded or not.
*/
static boolean register(final Context context, final String regId) {
Log.i(TAG, "registering device (regId = " + regId + ")");
//String serverUrl = SERVER_URL + "/register";
String serverUrl = SERVER_URL;
Map<String, String> params = new HashMap<String, String>();
params.put("regid", regId);
long backoff = BACKOFF_MILLI_SECONDS + random.nextInt(1000);
// Once GCM returns a registration id, we need to register it in the
// demo server. As the server might be down, we will retry it a couple
// times.
for (int i = 1; i <= MAX_ATTEMPTS; i++) {
Log.d(TAG, "Attempt #" + i + " to register");
try {
displayMessage(context, context.getString(
R.string.server_registering, i, MAX_ATTEMPTS));
post(serverUrl, params);
GCMRegistrar.setRegisteredOnServer(context, true);
String message = context.getString(R.string.server_registered);
CommonUtilities.displayMessage(context, message);
return true;
} catch (IOException e) {
// Here we are simplifying and retrying on any error; in a real
// application, it should retry only on unrecoverable errors
Log.e(TAG, "Failed to register on attempt " + i, e);
if (i == MAX_ATTEMPTS) {
break;
}
try {
Log.d(TAG, "Sleeping for " + backoff + " ms before retry");
Thread.sleep(backoff);
} catch (InterruptedException e1) {
// Activity finished before we complete - exit.
Log.d(TAG, "Thread interrupted: abort remaining retries!");
Thread.currentThread().interrupt();
return false;
}
// increase backoff exponentially
backoff *= 2;
}
}
String message = context.getString(R.string.server_register_error,
MAX_ATTEMPTS);
CommonUtilities.displayMessage(context, message);
return false;
}
/**
* Unregister this account/device pair within the server.
*/
static void unregister(final Context context, final String regId) {
Log.i(TAG, "unregistering device (regId = " + regId + ")");
String serverUrl = SERVER_URL + "/unregister";
Map<String, String> params = new HashMap<String, String>();
params.put("regId", regId);
try {
post(serverUrl, params);
GCMRegistrar.setRegisteredOnServer(context, false);
String message = context.getString(R.string.server_unregistered);
CommonUtilities.displayMessage(context, message);
} catch (IOException e) {
// At this point the device is unregistered from GCM, but still
// registered in the server.
// We could try to unregister again, but it is not necessary:
// if the server tries to send a message to the device, it will get
// a "NotRegistered" error message and should unregister the device.
String message = context.getString(R.string.server_unregister_error,
e.getMessage());
CommonUtilities.displayMessage(context, message);
}
}
/**
* Issue a POST request to the server.
*
* @param endpoint POST address.
* @param params request parameters.
*
* @throws IOException propagated from POST.
*/
private static void post(String endpoint, Map<String, String> params)
throws IOException {
URL url;
try {
url = new URL(endpoint);
} catch (MalformedURLException e) {
throw new IllegalArgumentException("invalid url: " + endpoint);
}
StringBuilder bodyBuilder = new StringBuilder();
Iterator<Entry<String, String>> iterator = params.entrySet().iterator();
// constructs the POST body using the parameters
while (iterator.hasNext()) {
Entry<String, String> param = iterator.next();
bodyBuilder.append(param.getKey()).append('=')
.append(param.getValue());
if (iterator.hasNext()) {
bodyBuilder.append('&');
}
}
String body = bodyBuilder.toString();
Log.v(TAG, "Posting '" + body + "' to " + url);
byte[] bytes = body.getBytes();
HttpURLConnection conn = null;
try {
conn = (HttpURLConnection) url.openConnection();
conn.setDoOutput(true);
conn.setUseCaches(false);
conn.setFixedLengthStreamingMode(bytes.length);
conn.setRequestMethod("POST");
conn.setRequestProperty("Content-Type",
"application/x-www-form-urlencoded;charset=UTF-8");
// post the request
OutputStream out = conn.getOutputStream();
out.write(bytes);
out.close();
// handle the response
int status = conn.getResponseCode();
if (status != 200) {
throw new IOException("Post failed with error code " + status);
}
} finally {
if (conn != null) {
conn.disconnect();
}
}
}
}
G. Now its time to write code for MainActivity. Before going to MainActivity, add the below code in res->layout->main.xml
And follow the below code for MainActivity.java
public class MainActivity extends Activity {
private String TAG = "** pushAndroidActivity **";
private TextView mDisplay;
TextView RuA,paC,DEF;
TextView Defense_Tackles[];
AsyncTask<Void, Void, Void> mRegisterTask;
@Override
public void onCreate(Bundle savedInstanceState) {
super.onCreate(savedInstanceState);
checkNotNull(SERVER_URL, "SERVER_URL");
checkNotNull(SENDER_ID, "SENDER_ID");
// Make sure the device has the proper dependencies.
GCMRegistrar.checkDevice(this);
// Make sure the manifest was properly set - comment out this line
// while developing the app, then uncomment it when it's ready.
GCMRegistrar.checkManifest(this);
setContentView(R.layout.main);
mDisplay = (TextView) findViewById(R.id.display);
registerReceiver(mHandleMessageReceiver,
new IntentFilter(DISPLAY_MESSAGE_ACTION));
final String regId = GCMRegistrar.getRegistrationId(this);
if (regId.equals("")) {
// Automatically registers application on startup.
GCMRegistrar.register(this, SENDER_ID);
} else {
// Device is already registered on GCM, check server.
if (GCMRegistrar.isRegisteredOnServer(this)) {
// Skips registration.
mDisplay.append(getString(R.string.already_registered) + "\n");
} else {
// Try to register again, but not in the UI thread.
// It's also necessary to cancel the thread onDestroy(),
// hence the use of AsyncTask instead of a raw thread.
final Context context = this;
mRegisterTask = new AsyncTask<Void, Void, Void>() {
@Override
protected Void doInBackground(Void... params) {
boolean registered =
ServerUtilities.register(context, regId);
// At this point all attempts to register with the app
// server failed, so we need to unregister the device
// from GCM - the app will try to register again when
// it is restarted. Note that GCM will send an
// unregistered callback upon completion, but
// GCMIntentService.onUnregistered() will ignore it.
if (!registered) {
GCMRegistrar.unregister(context);
}
return null;
}
@Override
protected void onPostExecute(Void result) {
mRegisterTask = null;
}
};
mRegisterTask.execute(null, null, null);
}
}
}
@Override
public boolean onCreateOptionsMenu(Menu menu) {
MenuInflater inflater = getMenuInflater();
inflater.inflate(R.menu.options_menu, menu);
return true;
}
@Override
public boolean onOptionsItemSelected(MenuItem item) {
switch(item.getItemId()) {
/*
* Typically, an application registers automatically, so options
* below are disabled. Uncomment them if you want to manually
* register or unregister the device (you will also need to
* uncomment the equivalent options on options_menu.xml).
*/
/*
case R.id.options_register:
GCMRegistrar.register(this, SENDER_ID);
return true;
case R.id.options_unregister:
GCMRegistrar.unregister(this);
return true;
*/
case R.id.options_clear:
mDisplay.setText(null);
return true;
case R.id.options_exit:
finish();
return true;
default:
return super.onOptionsItemSelected(item);
}
}
@Override
protected void onDestroy() {
if (mRegisterTask != null) {
mRegisterTask.cancel(true);
}
unregisterReceiver(mHandleMessageReceiver);
GCMRegistrar.onDestroy(this);
super.onDestroy();
}
private void checkNotNull(Object reference, String name) {
if (reference == null) {
throw new NullPointerException(
getString(R.string.error_config, name));
}
}
private final BroadcastReceiver mHandleMessageReceiver =
new BroadcastReceiver() {
@Override
public void onReceive(Context context, Intent intent) {
String newMessage = intent.getExtras().getString(EXTRA_MESSAGE);
mDisplay.append(newMessage + "\n");
}
};
NOTE: Push Notifications won't work in normal emulators. You must use Google APIs emulator and add your Google account in emulator (go to settings->Accounts & sync->Add account).
For server side example please follow link
http://www.tejaprakash.com/2013/05/push-messages-to-gcm-server-using-net.html
You will get screen like below on successful registration.

public class ServerUtilities {
private static final int MAX_ATTEMPTS = 5;
private static final int BACKOFF_MILLI_SECONDS = 1000;
private static final Random random = new Random();
/**
* Register this account/device pair within the server.
*
* @return whether the registration succeeded or not.
*/
static boolean register(final Context context, final String regId) {
Log.i(TAG, "registering device (regId = " + regId + ")");
//String serverUrl = SERVER_URL + "/register";
String serverUrl = SERVER_URL;
Map<String, String> params = new HashMap<String, String>();
params.put("regid", regId);
long backoff = BACKOFF_MILLI_SECONDS + random.nextInt(1000);
// Once GCM returns a registration id, we need to register it in the
// demo server. As the server might be down, we will retry it a couple
// times.
for (int i = 1; i <= MAX_ATTEMPTS; i++) {
Log.d(TAG, "Attempt #" + i + " to register");
try {
displayMessage(context, context.getString(
R.string.server_registering, i, MAX_ATTEMPTS));
post(serverUrl, params);
GCMRegistrar.setRegisteredOnServer(context, true);
String message = context.getString(R.string.server_registered);
CommonUtilities.displayMessage(context, message);
return true;
} catch (IOException e) {
// Here we are simplifying and retrying on any error; in a real
// application, it should retry only on unrecoverable errors
Log.e(TAG, "Failed to register on attempt " + i, e);
if (i == MAX_ATTEMPTS) {
break;
}
try {
Log.d(TAG, "Sleeping for " + backoff + " ms before retry");
Thread.sleep(backoff);
} catch (InterruptedException e1) {
// Activity finished before we complete - exit.
Log.d(TAG, "Thread interrupted: abort remaining retries!");
Thread.currentThread().interrupt();
return false;
}
// increase backoff exponentially
backoff *= 2;
}
}
String message = context.getString(R.string.server_register_error,
MAX_ATTEMPTS);
CommonUtilities.displayMessage(context, message);
return false;
}
/**
* Unregister this account/device pair within the server.
*/
static void unregister(final Context context, final String regId) {
Log.i(TAG, "unregistering device (regId = " + regId + ")");
String serverUrl = SERVER_URL + "/unregister";
Map<String, String> params = new HashMap<String, String>();
params.put("regId", regId);
try {
post(serverUrl, params);
GCMRegistrar.setRegisteredOnServer(context, false);
String message = context.getString(R.string.server_unregistered);
CommonUtilities.displayMessage(context, message);
} catch (IOException e) {
// At this point the device is unregistered from GCM, but still
// registered in the server.
// We could try to unregister again, but it is not necessary:
// if the server tries to send a message to the device, it will get
// a "NotRegistered" error message and should unregister the device.
String message = context.getString(R.string.server_unregister_error,
e.getMessage());
CommonUtilities.displayMessage(context, message);
}
}
/**
* Issue a POST request to the server.
*
* @param endpoint POST address.
* @param params request parameters.
*
* @throws IOException propagated from POST.
*/
private static void post(String endpoint, Map<String, String> params)
throws IOException {
URL url;
try {
url = new URL(endpoint);
} catch (MalformedURLException e) {
throw new IllegalArgumentException("invalid url: " + endpoint);
}
StringBuilder bodyBuilder = new StringBuilder();
Iterator<Entry<String, String>> iterator = params.entrySet().iterator();
// constructs the POST body using the parameters
while (iterator.hasNext()) {
Entry<String, String> param = iterator.next();
bodyBuilder.append(param.getKey()).append('=')
.append(param.getValue());
if (iterator.hasNext()) {
bodyBuilder.append('&');
}
}
String body = bodyBuilder.toString();
Log.v(TAG, "Posting '" + body + "' to " + url);
byte[] bytes = body.getBytes();
HttpURLConnection conn = null;
try {
conn = (HttpURLConnection) url.openConnection();
conn.setDoOutput(true);
conn.setUseCaches(false);
conn.setFixedLengthStreamingMode(bytes.length);
conn.setRequestMethod("POST");
conn.setRequestProperty("Content-Type",
"application/x-www-form-urlencoded;charset=UTF-8");
// post the request
OutputStream out = conn.getOutputStream();
out.write(bytes);
out.close();
// handle the response
int status = conn.getResponseCode();
if (status != 200) {
throw new IOException("Post failed with error code " + status);
}
} finally {
if (conn != null) {
conn.disconnect();
}
}
}
}
G. Now its time to write code for MainActivity. Before going to MainActivity, add the below code in res->layout->main.xml
<ScrollView xmlns:android="http://schemas.android.com/apk/res/android"
android:layout_width="fill_parent"
android:layout_height="fill_parent" >
<TextView
android:id="@+id/display"
android:layout_width="fill_parent"
android:layout_height="wrap_content" />
</ScrollView>
Create two xml files in res->menu->
1. activity_main.xml
Please follow code for activity_main.xml...
<menu xmlns:android="http://schemas.android.com/apk/res/android">
<item android:id="@+id/menu_settings"
android:title="@string/menu_settings"
android:orderInCategory="100" />
</menu>
Create two xml files in res->menu->
1. activity_main.xml
Please follow code for activity_main.xml...
<menu xmlns:android="http://schemas.android.com/apk/res/android">
<item android:id="@+id/menu_settings"
android:title="@string/menu_settings"
android:orderInCategory="100" />
</menu>
2. options_menu.xml
Please follow code for options_menu.xml...
<?xml version="1.0" encoding="utf-8"?>
<menu xmlns:android="http://schemas.android.com/apk/res/android" >
<item
android:id="@+id/options_clear"
android:title="@string/options_clear">
</item>
<item
android:id="@+id/options_exit"
android:title="@string/options_exit">
</item>
</menu>
public class MainActivity extends Activity {
private String TAG = "** pushAndroidActivity **";
private TextView mDisplay;
TextView RuA,paC,DEF;
TextView Defense_Tackles[];
AsyncTask<Void, Void, Void> mRegisterTask;
@Override
public void onCreate(Bundle savedInstanceState) {
super.onCreate(savedInstanceState);
checkNotNull(SERVER_URL, "SERVER_URL");
checkNotNull(SENDER_ID, "SENDER_ID");
// Make sure the device has the proper dependencies.
GCMRegistrar.checkDevice(this);
// Make sure the manifest was properly set - comment out this line
// while developing the app, then uncomment it when it's ready.
GCMRegistrar.checkManifest(this);
setContentView(R.layout.main);
mDisplay = (TextView) findViewById(R.id.display);
registerReceiver(mHandleMessageReceiver,
new IntentFilter(DISPLAY_MESSAGE_ACTION));
final String regId = GCMRegistrar.getRegistrationId(this);
if (regId.equals("")) {
// Automatically registers application on startup.
GCMRegistrar.register(this, SENDER_ID);
} else {
// Device is already registered on GCM, check server.
if (GCMRegistrar.isRegisteredOnServer(this)) {
// Skips registration.
mDisplay.append(getString(R.string.already_registered) + "\n");
} else {
// Try to register again, but not in the UI thread.
// It's also necessary to cancel the thread onDestroy(),
// hence the use of AsyncTask instead of a raw thread.
final Context context = this;
mRegisterTask = new AsyncTask<Void, Void, Void>() {
@Override
protected Void doInBackground(Void... params) {
boolean registered =
ServerUtilities.register(context, regId);
// At this point all attempts to register with the app
// server failed, so we need to unregister the device
// from GCM - the app will try to register again when
// it is restarted. Note that GCM will send an
// unregistered callback upon completion, but
// GCMIntentService.onUnregistered() will ignore it.
if (!registered) {
GCMRegistrar.unregister(context);
}
return null;
}
@Override
protected void onPostExecute(Void result) {
mRegisterTask = null;
}
};
mRegisterTask.execute(null, null, null);
}
}
}
@Override
public boolean onCreateOptionsMenu(Menu menu) {
MenuInflater inflater = getMenuInflater();
inflater.inflate(R.menu.options_menu, menu);
return true;
}
@Override
public boolean onOptionsItemSelected(MenuItem item) {
switch(item.getItemId()) {
/*
* Typically, an application registers automatically, so options
* below are disabled. Uncomment them if you want to manually
* register or unregister the device (you will also need to
* uncomment the equivalent options on options_menu.xml).
*/
/*
case R.id.options_register:
GCMRegistrar.register(this, SENDER_ID);
return true;
case R.id.options_unregister:
GCMRegistrar.unregister(this);
return true;
*/
case R.id.options_clear:
mDisplay.setText(null);
return true;
case R.id.options_exit:
finish();
return true;
default:
return super.onOptionsItemSelected(item);
}
}
@Override
protected void onDestroy() {
if (mRegisterTask != null) {
mRegisterTask.cancel(true);
}
unregisterReceiver(mHandleMessageReceiver);
GCMRegistrar.onDestroy(this);
super.onDestroy();
}
private void checkNotNull(Object reference, String name) {
if (reference == null) {
throw new NullPointerException(
getString(R.string.error_config, name));
}
}
private final BroadcastReceiver mHandleMessageReceiver =
new BroadcastReceiver() {
@Override
public void onReceive(Context context, Intent intent) {
String newMessage = intent.getExtras().getString(EXTRA_MESSAGE);
mDisplay.append(newMessage + "\n");
}
};
NOTE: Push Notifications won't work in normal emulators. You must use Google APIs emulator and add your Google account in emulator (go to settings->Accounts & sync->Add account).
For server side example please follow link
http://www.tejaprakash.com/2013/05/push-messages-to-gcm-server-using-net.html
You will get screen like below on successful registration.
You will receive push notifications like below

Download sample code from below links.
good one.....
ReplyDeleteGreat Article...
ReplyDeletei want to use Google cloud messaging with .net webservice... i m creating an app like whatsapp.
so what i should i do in my .net side. plz help tejaprakash
Create new .net web-service as follows
Deletehttp://www.tejaprakash.com/2013/01/create-basic-web-service-using-dot-net.html
then write a method for posting the regID into your database.
CODE will be like this
sp_Name = "Proc_PushData_Android";
Conn = new SqlConnection(connectionString);
Cmd = new SqlCommand(sp_Name, Conn);
Cmd.CommandType = CommandType.StoredProcedure;
Cmd.Parameters.AddWithValue("@User_RegId", regid);
Conn.Open();
Cmd.ExecuteNonQuery();
Conn.Close();
return true;
And create a new .net application to push messages.
I will post a complete article in a couples of day.
Thanks...
Hi Tej,
ReplyDeleteWould you be able to share the codes ? especially the server side. . i would appreciate any help you could offer in this regard
Hi Pravz,
DeletePlease follow this link http://www.tejaprakash.com/2013/05/push-messages-to-gcm-server-using-net.html
Any doubts contact me.
Thanks.....
can u please email me the project? emredurmuss@hotmail.com Thanks A lot
ReplyDeleteaccoring to your post i have tried but application ask me for registration Id so how can i get the registration id. Can you send me the client and server application project on email id - deepakch46@gmail.com
ReplyDeleteHi Deepak,
DeleteDid you observe this step in Main Activity .....
final String regId = GCMRegistrar.getRegistrationId(this);
Catch that registrationID and save in your DB.All the code i have given above.Just change the WEB-service URL(SERVER_URL) in CommonUtilities.java.
You will get regID on first time.If you want it again then re-install Your application and look at the log-cat window.
hi Tej.. what we have to Write in option_main.xml file i am getting error in mainactivity.java file.please help me
ReplyDeleteHi mani,
DeleteSorry for your inconvenience...
I have updated my article. Please have a look at it(G).
hello tej. thanks a lot again for your help.
Deleteyour GCM tutorial is great.it helped me a lot. i learnt from your article a lot. i followed your tutorial completely. i got regid even my service and web application is also working fine.
when am sending a msg via web application i am getting id also. bt i am not recieving msg on client side. may be i am using emulator that y.but in emulator also, i am using gogle api emulator and i added my account also still i am not getting any notification.
so may be you can help me.where i am doing wrong.
waiting your positive response..
Thanks again for your 5-Star tutorial its really great. :)
Hi mani,
DeleteEmulator doesn't work all the time perfectly.Use mobile for best results.
Thanks....
hi tej. i used google nexus 7 for this app.but still it is not showing any notification.. application is working fine for both side .i am not getting any error.but still i am not able to find out why notification is not coming.help me tej
DeleteMake sure that the details in commonUtilities.java and manifest is correct or Check the regID and senderID that your sending to GCM server.
Deletetej i checked my both file .. i am pasting here .i am not getting any error. will you please tell me where i am doing wrong.
Deletemy commonUtilities.java file:
package com.gcmapp;
import android.content.Context;
import android.content.Intent;
public final class CommonUtilities {
static final String SERVER_URL="http://192.168.1.203:83/Service1.asmx/input?regid=";
static final String SENDER_ID="1041529492790";
static final String TAG = "manish Creative";
static final String DISPLAY_MESSAGE_ACTION="com.gcmapp.DISPLAY_MESSAGE";
static final String EXTRA_MESSAGE="message";
static void displayMessage(Context context,String message){
Intent intent=new Intent(DISPLAY_MESSAGE_ACTION);
intent.putExtra(EXTRA_MESSAGE,message);
context.sendBroadcast(intent);
}
}
i am not able to paste here my manifest file.
Hi tej, how can i clear notication message which is read by user ?
ReplyDeleteHi,
ReplyDeleteCan you share the sample code for above.
Hi swayan, Drop your Mail-ID.
DeleteHi Tej,
Deleteplease send the SC to swatkrish@gmail.com
Can you mail me the project?
ReplyDeletecoolermage@hotmail.com
Hi tej your code is transparent it works like magic :) thanks for sharing your wonders with us................
ReplyDeletecan u share the code....rhomit.srivastava@gmail.com
ReplyDeleteHi sri, code sent to you.
DeleteCan You Mail Me Your service file?
ReplyDeletecoolermage@hotmail.com
Hi SK,
DeleteGet code from below link
https://app.box.com/s/khp8nqrpw2nsswwr65oa
Hi Prakash can you send me android SC to faceabr332@gmail.com
ReplyDeleteDownload from below link..
Deletehttps://app.box.com/s/khp8nqrpw2nsswwr65oa
This includes android SC also ?? Because i am able to find .net SC only.
DeleteNo. it's only service.This is link for Android SC--https://app.box.com/s/pi2flam3lrlrtwwe7t0v.
DeleteHello Tej ,
ReplyDeleteCan you send me the code of android side as I by going to
https://app.box.com/s/khp8nqrpw2nsswwr65oa
the above link I am only getting the C# code
my email id : meghal.j.adesra@gmail.com
Hi Meghal,
DeleteSorry for your convenience. This is the link for android source code--
https://app.box.com/s/pi2flam3lrlrtwwe7t0v
Hi tej can you tell me about "import static com.example.samplive.CommonUtilities.SERVER_URL;" import. it can not be resolved
ReplyDeleteHi Ahmed,
ReplyDeleteServer_Url is your web-service link. It posts/saves your registrationID in your server. You have to mention it in COMMONUTILITIES Activity.And import it in ServerUtilities Activity.
I understand that but my question is what is com.example
ReplyDeleteAhmed, That is Package Name!!
Deleteok thanx
Deletehi tej can we exactly copy paste the manifest file without application tag. and just change the name of package.
ReplyDeletecan you please send me client side code on mudassarahmed14b@yahoo.com
ReplyDeleteYes, its sufficient for manifest file. And here the download link for client code-----
Deletehttps://app.box.com/s/pi2flam3lrlrtwwe7t0v
Tej i need your help ?? Here is the url of my webservice
ReplyDeletestatic final String SERVER_URL = "http://www.letmeeat.co.uk/data.asmx/getregistrationidfromAndoridapp";
From GCM Device successfully registered but Could not register device on demo server after 5 attempts. Why it is not registered with on my server.
its work like a chram :) Thanks man
ReplyDeleteHi Tej, is it possible to register in GCM through WCF Service?
ReplyDeleteSend IMEI number from Android device to wcf service, then WCF service sends the IMEI number to GCM for registration.
Hi Ranjith, I think you must register with your device only. GCM server takes your appID and device ID for communication.
ReplyDeleteTej,
Deleteif GCM server wants AppID and deviceID we can pass from WCF service also correct?
Hi Tej, Your post is really great. I am new to Android so while trying to execute the example i could not go much ahead. I am getting issues with gcm.jar I am unable to refer it in the project. I am using Android studio can you please help how to do that. I have already done the below actions
ReplyDelete1) Added new libs folder and pasted the gcm.jar file
2) Right click it and hit 'Add as library'
3) In build.gradel i have added
dependencies {
compile: 'com.google.android.gms:play-services:3.1.+'
}
4) On Build i am getting Gradle: package com.google.android.gcm does not exist
Please help. I will be great if you share client code in Android Developer or if you can share your email I can post my solution.
Hi Asif, you can download client code from the below link...
Deletehttps://app.box.com/s/pi2flam3lrlrtwwe7t0v.
i dont understand "http://10.0.2.2:10739/GCM-server.asmx/PostRegistration-Id"
ReplyDeleteyou can help me!
send for me the file GCM-server.asmx?
Hi Quoc, that is service link. You have to save RegId in DB through service. You can find service code below link: https://app.box.com/s/khp8nqrpw2nsswwr65oa
Deletehello tej can u give me "Proc_PushData_Android" stored procedure
ReplyDeleteand Proc_PushGetRegId stored procedure
ReplyDeleteHi Vishal, you can find all the stored procedures file from below link. Download & extract it. Find the file "Stored_procedure Code.txt"
Deletehttps://app.box.com/s/khp8nqrpw2nsswwr65oa
Hii Tej,
ReplyDeletetried everywhere google client app not working, it worked once then it wont ,
please mail me android client GCM app with asp.net web services example
really need it
jtushar53@gmail.com
i downloaded your above attachment , but its manifest is empty, it cant acces GCMBaseIntentService somehow , also we have to add play service library o our project
, waiting for you reply
Hi Tushar,
Deletei have mailed the code.
hiii tej
ReplyDeleteEven i also need the client GCM app with asp.net web services example
please mail me i really need it
email:gorakshkivale@gmail.com
Hi Tej,
ReplyDeleteGreat article,How do i get the server URL?
Is it the URL of my project hosted in Google ? (https://console.developers.google.com/project/xxxxx)?
Hey Hi Tej ,
ReplyDeleteWill you please mail me all needed code to my mail id ..
my email id is arshad.d.shaikh@gmail.com
This comment has been removed by the author.
ReplyDeleteDatabase code
DeleteHii Tej,
ReplyDeletetried everywhere google client app not working, it worked once then it wont ,
please mail me android client GCM app with asp.net web services example
really need it
vadivxaya@gmail.com
hi Tej,
ReplyDeletei am also tried like VADIVXAYA but found nothing. can you please mail me android client GCM app with asp.net web services example. I am very Thankful to you. my email id is howsmart_12@hotmail.com
i used the above code but didn't get the notification on emuletor can i get help? no error is there..
ReplyDeleteHow can I send notifications to selected users of my app? I creates a goal and assigns it to some users who logged into my app.I have their login id.
ReplyDeleteHi Praveen, Take Registration ID's of particular users and send them the messages.
DeleteHi Tej,
ReplyDeleteApplication does not throw any error, but not seding any message.I get respone id=0:1424790413054351%b24a931b66d6cf16
Hi Shyam,
DeleteI think there is no problem with your sending message to GCM server. But check your Android application code once and make sure that ID's should be same.
Hi Tej,
DeleteI have used all the way checked many times.. All looks good to me.Can I share my code with you?
Yeah sure! Mail-Id: info@tejaprakash.com.
DeleteHi Tej,
DeleteI shared with you through GDrive. Please let me know if you still did not get email.
Hi Shyam, I didn't get any mail.
Deletecan u check ur spam?
ReplyDeleteHi Tej,
ReplyDeleteCheck this link:
https://www.dropbox.com/s/9ourat4vt1ofe2t/AndroidPushNotifications.rar?dl=0
Hi Shyam, You have given server side code(.net application). It working fine. Please check your Android appication code.
DeleteHi Teja,
DeleteAndroid app is developed by another Dev, but he did not implement any code for OnMessage and other things.
He just letting receive any type of notification for testing. Can you let me what may be the issue?
Hi,
ReplyDeleteIf app is installed on 10 users phone, do all users send regId to Server? I tried with one user regId in my Server to Send Push notifications, I did received notification But is that means only one user will receive it ? why do we need to send all users regId to Server? In that case how can I send push notification for all app users? Is there any other way ?
Thanks
Hi Ashok,
DeleteYes, your server saves all the 10 users REGID's which are installed. You need to manage the notification system depends on your requirement. The REGID is unique for every mobile/application. So, you need to send all the REGID's to server. You can push the notifications up to 1000 users in single post.
hi tej how to put insert regid method in android
ReplyDeleteHi Tej,
ReplyDeleteCan you help me to send Image in notification using above code??
Can you please only the android application . Email Address is :- abdullahshams55@gmail.com
ReplyDelete