Sunday, December 30, 2012

How to create a new Android Emulator with Eclipse


First you have to setup your Eclipse with android sdk.
visit here android setup with Eclipse.


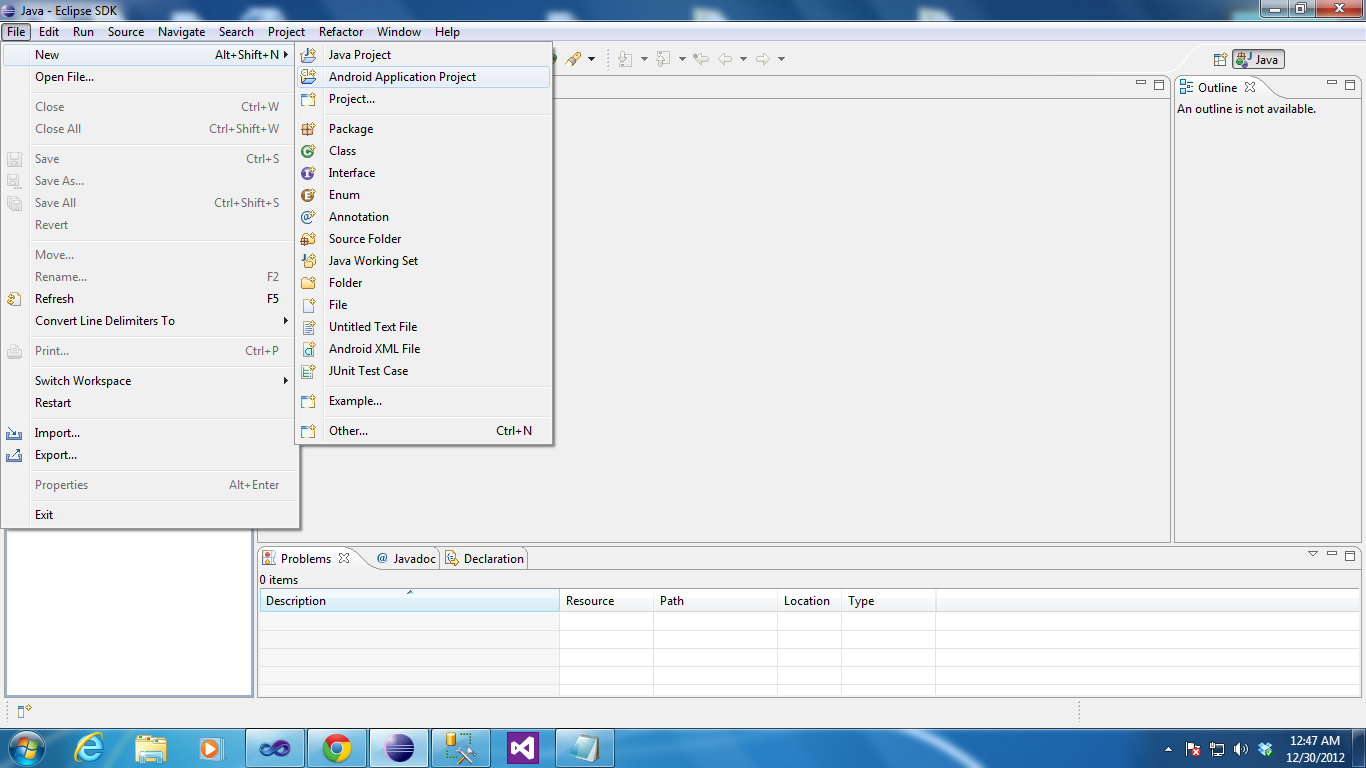
After starting Eclipse,

Click AVD manager icon in toolbar. If you not find it there then go to WINDOWS->Android Virtual Device Manager
Click New in AVD window and fill the form that appears.


Fill Device name, give your device screen size, give the target of device (Device version) and remaining are optional.


Select the device and click Start.........
Launch it.......
Finally you will get this.......


Read More »

Create a first Android project with Eclipse.

In this tutorial, i am going to explain that how to make an first android application or project with Eclipse.First you have to setup your Eclipse with android sdk.
visit here android setup with Eclipse.

Create a First Project with Eclipse

Start Eclipse, Click File->New->Android Application Project.


Fill in the form that appears

1. Application Name is the app name that appears to users. For this project, use "MyFirstApp."
2. Project Name is the name of your project directory and the name visible in Eclipse.
3. Package Name is the package namespace for your app.It should be unique name across the all android app in your system as well as goggle play.
4. Minimum Required SDK is the lowest version of Android that your app supports, indicated using the API Level.
5. Target SDK indicates the highest version of Android with which you have tested with your application(Max version of your app should work).
6. Compile With is the platform version against which you will compile your app. By default, this is set to the latest version of Android available in your SDK.
7. Theme specifies the Android UI style to apply for your app.
Click Next......

Set your app location here and Click Next.

You can choose Launch Icon,Shape and background color for your app and click Next.
Choose your Activity type here and click Next.

Click Finish.

Your app appeared in Package explorer like this...

Run your app in Emulator
Right Click on your project->Run as-> Android Application

You will get output like this......


Launch Icon will appear in home screen like this


Read More »

Thursday, December 27, 2012

Installation of android SDK.

Now it is very easy to install android sdk in your windows.But in older process you have to do lot things like you have download eclipse, Android sdk and then you have setup the ADT plugin. 
Now Android provides you all in-built SDK and make it easy in 2 steps.
Step 1: Download and install java.
Step 2: Download eclipse that having in-built android sdk.

Now you can develop the android apps.........

How to download and install java?

For developing an android app you should have min 1.5 java version. If you don't have download it here.
1. Double click on a downloaded file and install java in the default directory path, C:\Program Files\Java
2. After the installer finish, read and accept the license agreement. For mostly, the typical install will be fine.
3. Then click finish. That is it, your installation complete.
4. And then set the CLASS-PATH and PATH. Copy the java installed directory paths like  "C:\Program Files\Java\jdk1.7.0_05\bin" for System Variable ,
 "C:\Program Files\Java\jdk1.7.0_05\lib" for User variable and follow the below process.

Windows XP
  1. Select Start, select Control Panel. double click System, and select the Advanced tab.
  2. Click Environment Variables. In the section System Variables, find the PATH environment variable and select it. Click Edit. If the PATH environment variable does not exist, click New.
  3. In the Edit System Variable (or New System Variable) window, specify the value of the PATH environment variable. Click OK. Close all remaining windows by clicking OK.
  4. Again click Environment Variables. In the section User Variable, click on new and give the following values.
    Variable name = CLASS and variable value ="the whole path" you copied from lib folder.
  5. Click OK.

     
Windows Vista:
  1. From the desktop, right click the My Computer icon.
  2. Choose Properties from the context menu.
  3. Click the Advanced tab (Advanced system settings link in Vista).
  4. Click Environment Variables. In the section System Variables, find the PATH environment variable and select it. Click Edit. If the PATH environment variable does not exist, click New.
  5. In the Edit System Variable (or New System Variable) window, specify the value of the PATH environment variable. Click OK. Close all remaining windows by clicking OK.
  6. Again click Environment Variables. In the section User Variable, click on new and give the following values.
    Variable name = CLASS and variable value ="the whole path" you copied from lib folder.
  7. Click OK.
Windows 7:
  1. From the desktop, right click the Computer icon.
  2. Choose Properties from the context menu.
  3. Click the Advanced system settings link.
  4. Click Environment Variables. In the section System Variables, find the PATH environment variable and select it. Click Edit. If the PATH environment variable does not exist, click New.
  5. In the Edit System Variable (or New System Variable) window, specify the value of the PATH environment variable. Click OK. Close all remaining windows by clicking OK.
  6. Again click Environment Variables. In the section User Variable, click on new and give the following values.
    Variable name = CLASS and variable value ="the whole path" you copied from lib folder.
  7. Click OK.
Windows 8:

  1. Drag the Mouse pointer to the Right bottom corner of the screen
  2. Click on the Search icon and type: Control Panel
  3. Click on -> Control Panel -> System -> Advanced
  4. Click on Environment Variables, under System Variables, find PATH, and click on it.
  5. In the Edit windows, modify PATH by adding the location of the class to the value for PATH. If you do not have the item PATH, you may select to add a new variable and add PATH as the name and the location of the class as the value.
  6. Close the window.
  7. Reopen Command prompt window, and run your java code.

Thus the complete java installation process.

How to download Android SDK?

Now you no need to download eclipse. You can download Eclipse that built android sdk.
Download link here.
Click on "ADT Bundle for windows", accept the agreement and mark the option that your system supports either 32 or 64-bit. Download and extract it.
Open the Eclipse file and enjoy the coding..................

Read More »

Monday, August 6, 2012

Android Installation Reqiurements

Android Installation :


Main requirements for android installation..
1.Java (min 1.5jdk)
2.Android SDK
3.Eclipse
4.Android ADT plug-in

System Requirements:

In order to use a Android SDK and tools for development then you will of course need a suitable environment develop from.
Currently the following operating systems are supported:
    1. Windows XP or 7 or later
    2. Mac OS X 10.4.8 or later (x86 only)
    3. Linux (tested on Linux Ubuntu Dapper Drake)
You will also need to install a suitable development environment such as:


Read More »