In this tutorial, i am going to explain that how to make an first android application or project with Eclipse.First you have to setup your Eclipse with android sdk.
visit here android setup with Eclipse.
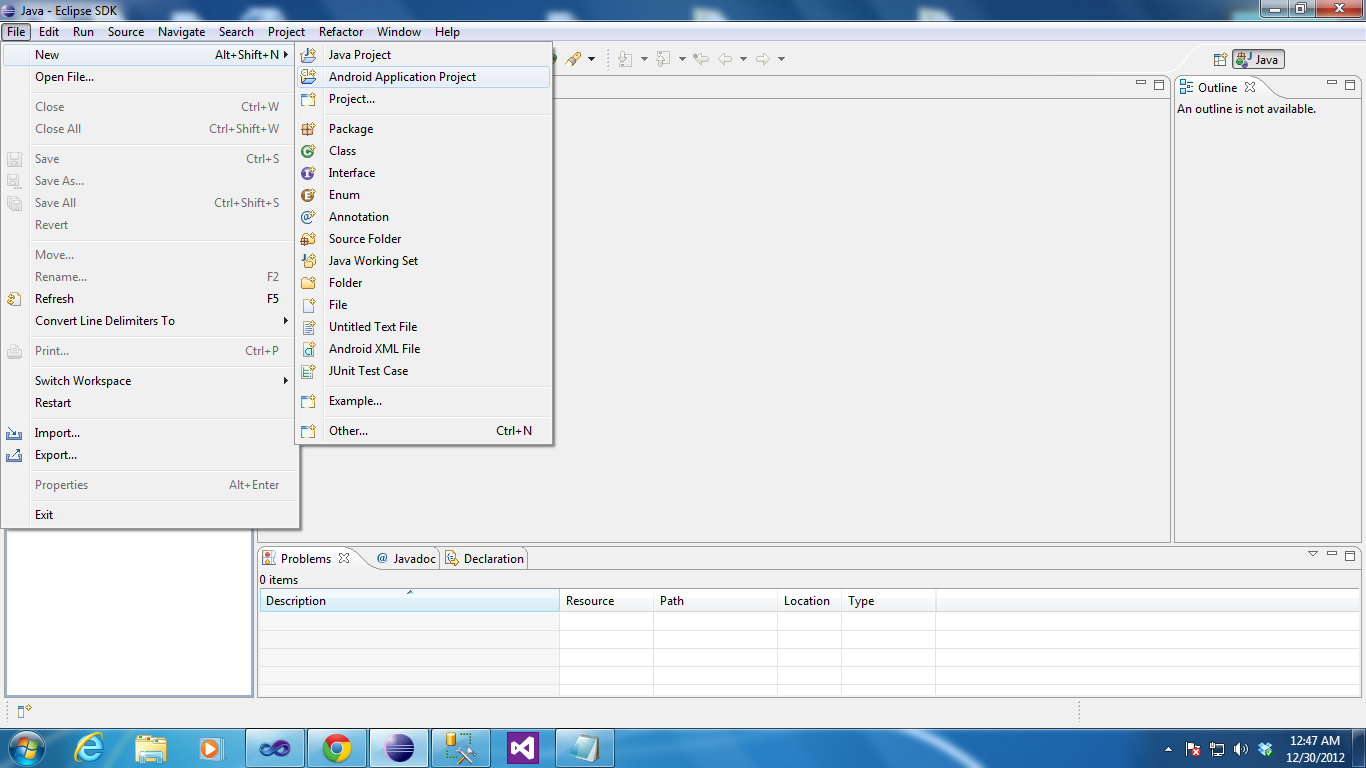
Create a First Project with Eclipse
Start Eclipse, Click File->New->Android Application Project.
 Fill in the form that appears

1. Application Name is the app name that appears to users. For this project, use "MyFirstApp."
2. Project Name is the name of your project directory and the name visible in Eclipse.
3. Package Name is the package namespace for your app.It should be unique name across the all android app in your system as well as goggle play.
4. Minimum Required SDK is the lowest version of Android that your app supports, indicated using the API Level.
5. Target SDK indicates the highest version of Android with which you have tested with your application(Max version of your app should work).
6. Compile With is the platform version against which you will compile your app. By default, this is set to the latest version of Android available in your SDK.
7. Theme specifies the Android UI style to apply for your app.
Click Next......

Set your app location here and Click Next.

You can choose Launch Icon,Shape and background color for your app and click Next.
 Choose your Activity type here and click Next.

Click Finish.
Your app appeared in Package explorer like this...

Run your app in Emulator
Right Click on your project->Run as-> Android Application

You will get output like this......


visit here android setup with Eclipse.
Create a First Project with Eclipse
Start Eclipse, Click File->New->Android Application Project.

1. Application Name is the app name that appears to users. For this project, use "MyFirstApp."
2. Project Name is the name of your project directory and the name visible in Eclipse.
3. Package Name is the package namespace for your app.It should be unique name across the all android app in your system as well as goggle play.
4. Minimum Required SDK is the lowest version of Android that your app supports, indicated using the API Level.
5. Target SDK indicates the highest version of Android with which you have tested with your application(Max version of your app should work).
6. Compile With is the platform version against which you will compile your app. By default, this is set to the latest version of Android available in your SDK.
7. Theme specifies the Android UI style to apply for your app.
Click Next......

Set your app location here and Click Next.


Click Finish.
Your app appeared in Package explorer like this...

Right Click on your project->Run as-> Android Application

You will get output like this......

Launch Icon will appear in home screen like this

No comments:
Post a Comment